Lefse
Pronounced ‘Leff - sah’, this Norwegian flatbread is a time-honored tradition. Nowadays, lefse if primarily made around Christmastime, but historically it was something Norwegians made enough of to last the whole year.
Though it isn’t the easiest or quickest of breads to prepare, it’s one you’ll enjoy all the same. Soft, pillowy, full of butter and cream, you’ll soon learn to love it as much as I do.
Tips and Tricks
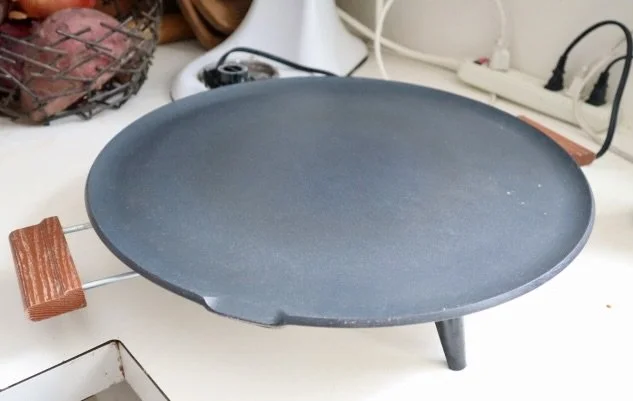
Do I need a lefse grill to make this?
You don’t absolutely have to, but it really helps! For starters, not all flat grills will easily get up to 500 degrees Fahrenheit, the degree you’ll need to grill your bread. It’s also wide enough that you have the space needed for larger-sized lefse.
But if a lefse grill isn’t something you’re willing to invest in, use any of the following: electric griddle, pancake griddle, nonstick skillet, or a heated pizza stone.
Do I have to prepare all the lefse at once?
You certainly don’t! The great thing about potatoes is it will stay fresh in the refrigerator for a couple of days, giving you the freedom to take breaks.
Do I cover the potatoes when they’re in the fridge?
Definitely don’t cover the potatoes. Doing so will create moisture, making your potatoes too wet and much more difficult to work with.
My dough keeps falling apart when I roll it. What do I do?
This is very frustrating, and can make the process burdensome. Remember that more flour is better than not enough. You might be surprised just how much you need to flour your boards to prevent the lefse from sticking.
Also remember to be patient and to enjoy the process. Lefse benefits from the gentle touch, not a rushed rolling process.
Finally, if it’s just not happening for you, roll the dough into a ball again and place back in the fridge to work with later.
Ingredients:
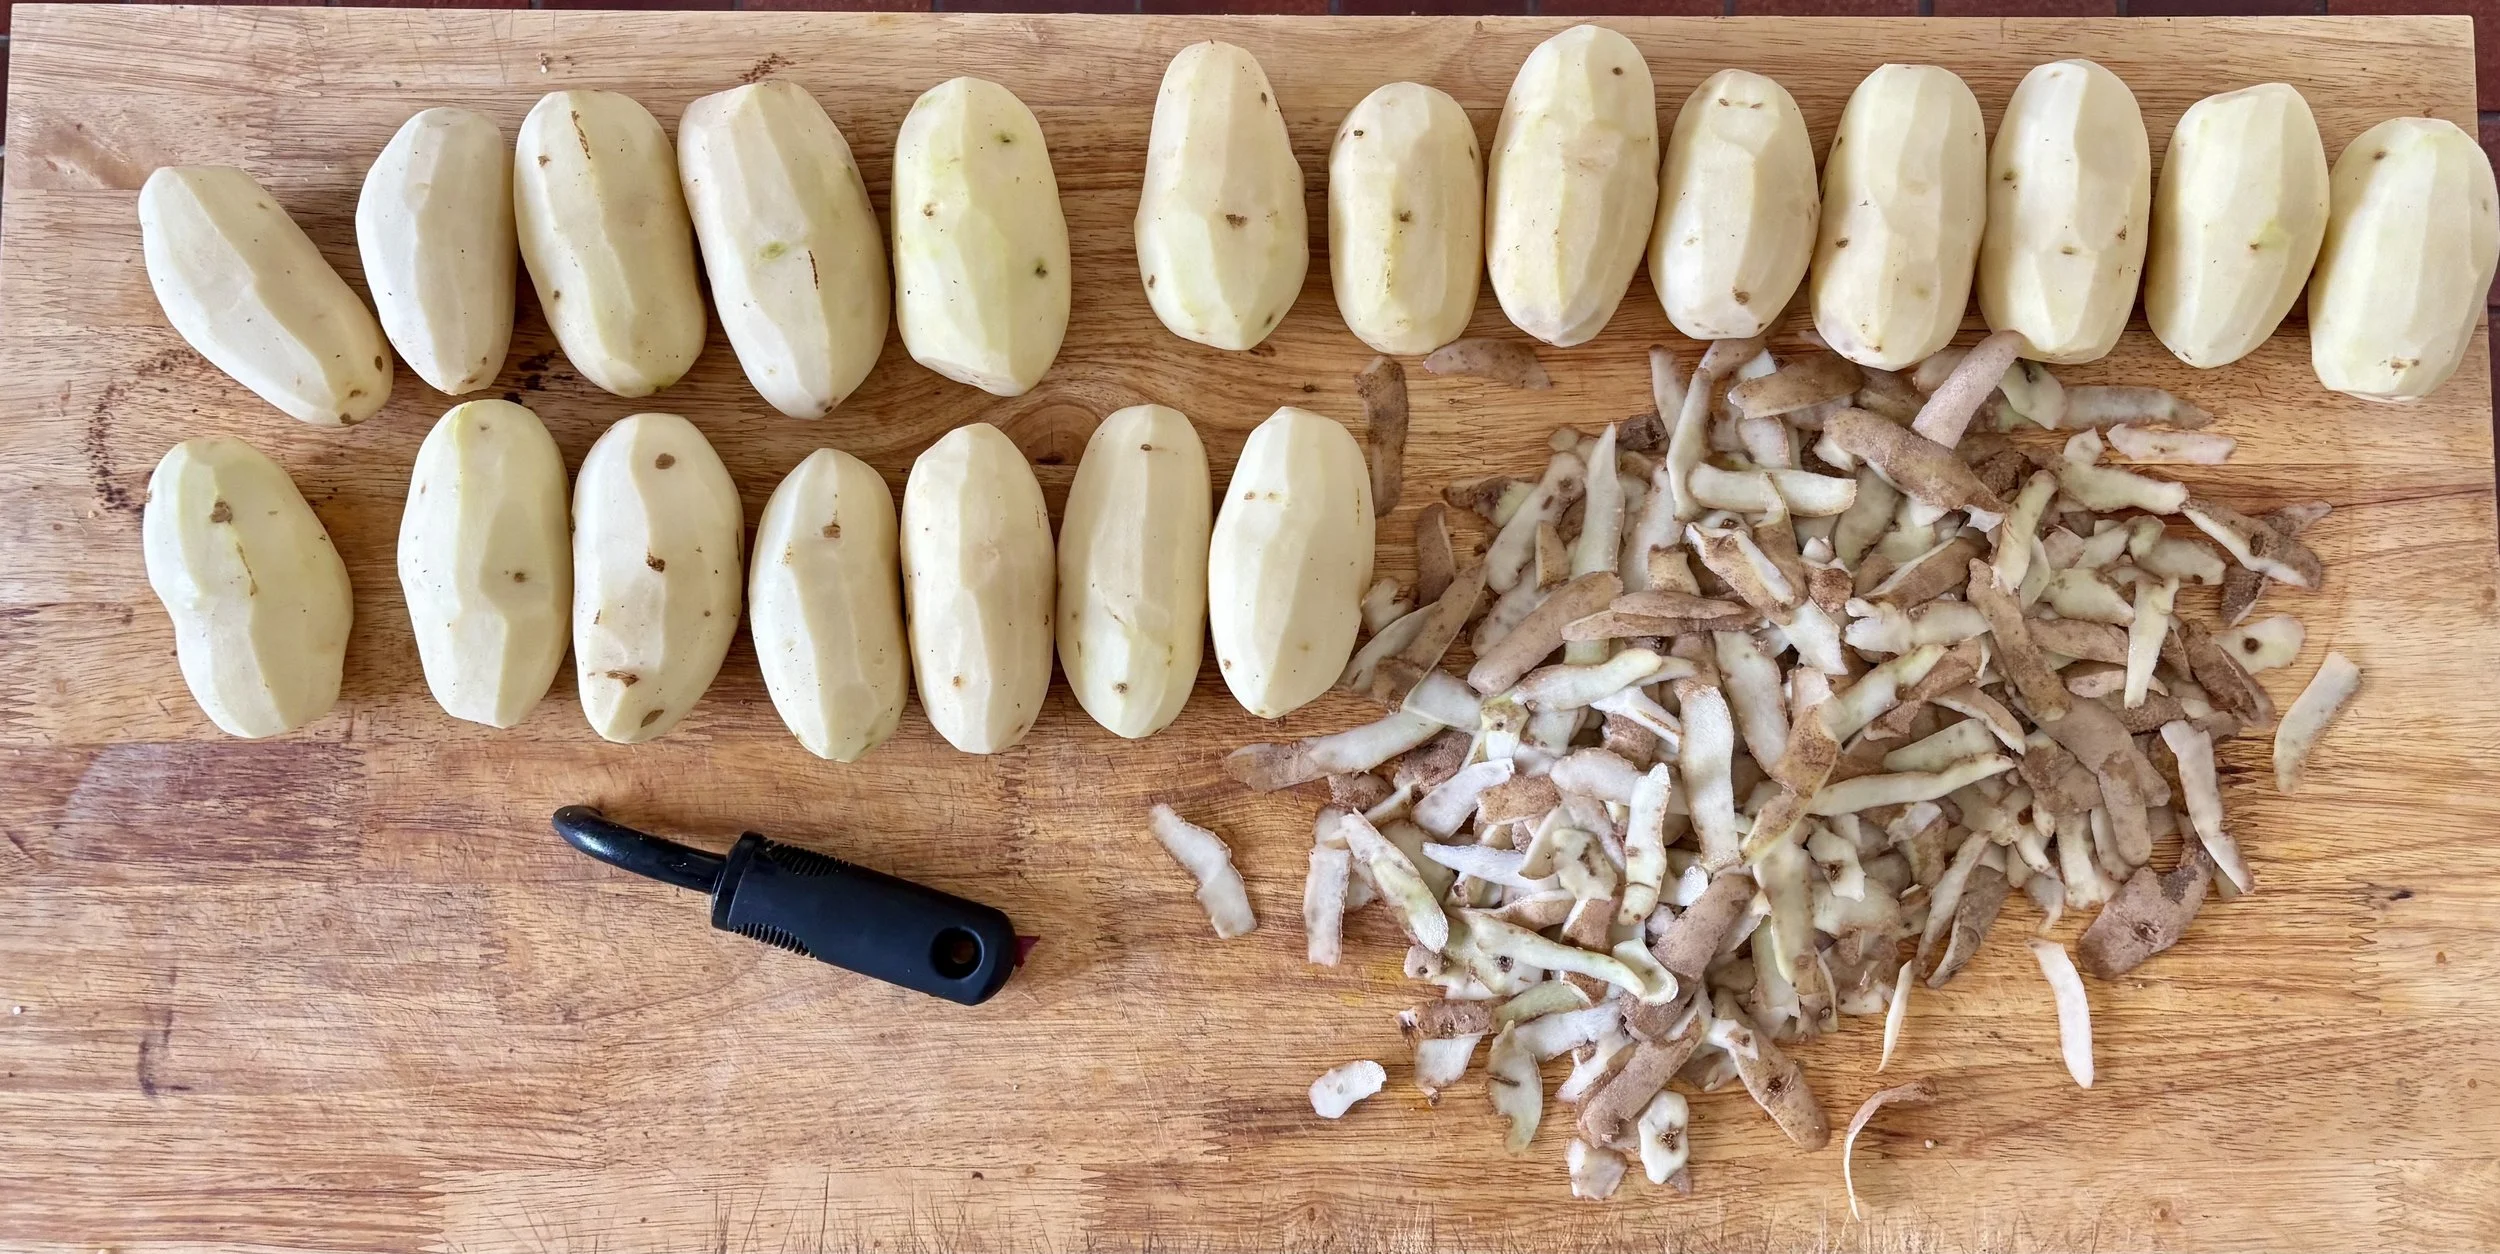
5 lbs. russet potatoes, peeled (about 16 - 20 potatoes
1/2 cup (1 stick) plant-based or dairy butter
1/2 - 3/4 cup plant-based 1/2 and 1/2 (or heavy cream)
1 tbsp kosher salt
4 cups all-purpose flour (plus more for flouring your board)
Day 1:
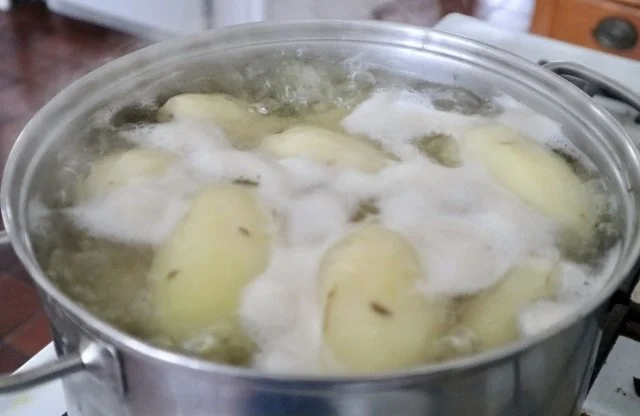
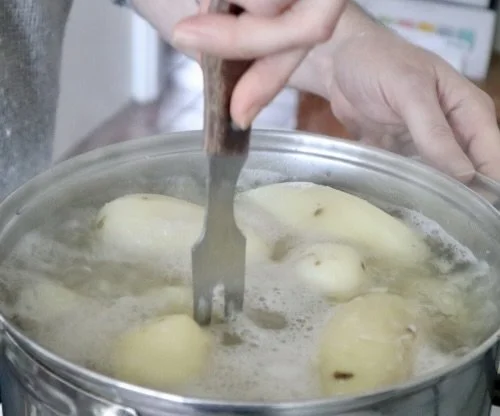
Start by peeling your potatoes. (You can save the peels to make hash browns). Place the potatoes in a large soup tureen or 2 medium-sized tureens if they don’t all fit in one. Add just enough water to barely cover them all and heat until they start boiling.
Let cook until they’re tender enough that you can prick them with a fork, but not so tender that they crumble. You can either drain them all and then start ricing, or rice as you go.

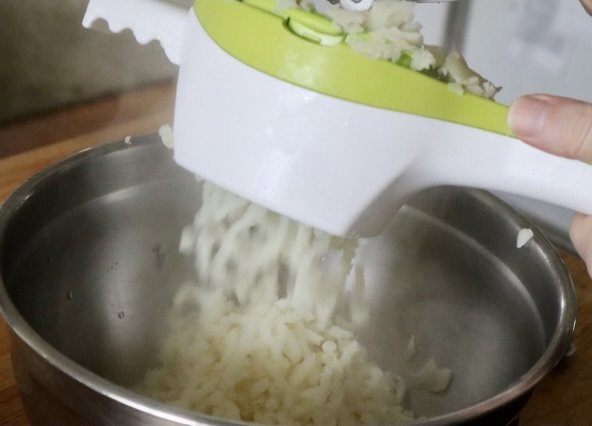
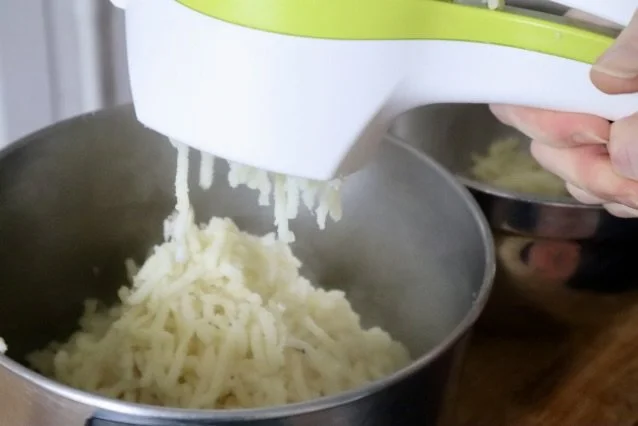
Once your potatoes are soft enough, start ricing. For lefse, you’ll want to rice them twice to achieve a completely smooth, tender dough. It’s best to have two large bowls/containers prepared in advance.
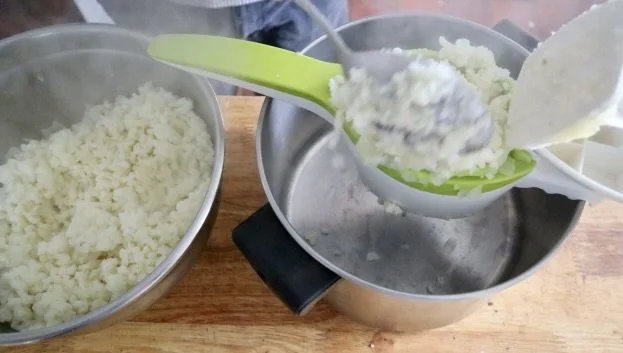
Using a potato ricer, rice your potatoes into the first large bowl. Once that bowl is full, take some of these riced potatoes and rice them a second time into the second bowl.
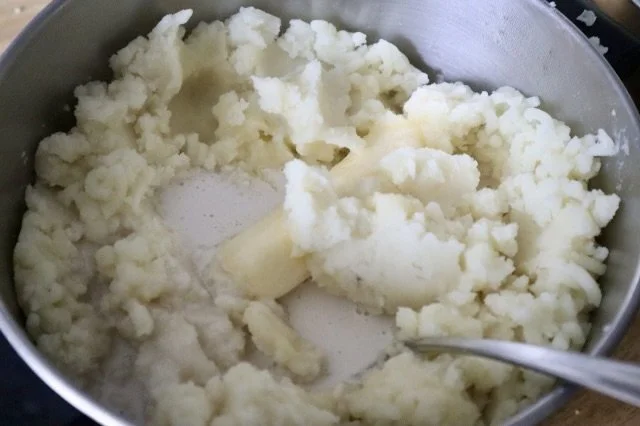
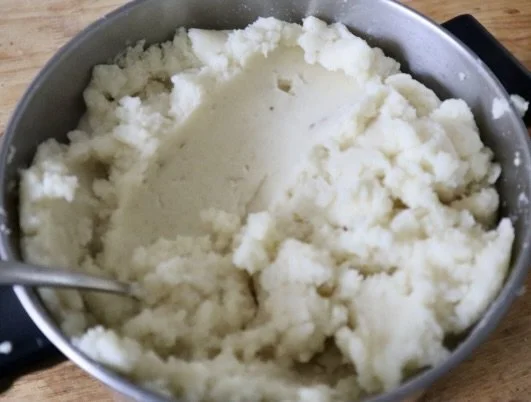
Once all the potatoes are riced, add the butter, half and half (or heavy cream), and salt. Stir these in, mashing as you go (the potatoes should be very easy to handle by now). Add more half and half if the potatoes need a touch more liquid. Taste test for salt.
Place in the fridge (uncovered!) and let cool completely. Wait several hours for this to happen or let sit overnight.

Day 2:
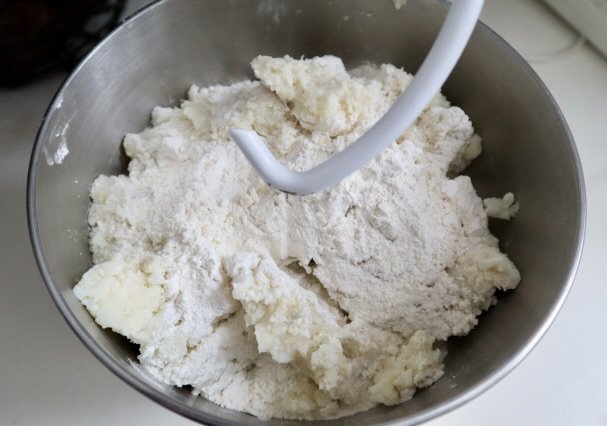
Take the potatoes out of the fridge. Now you’ll add the flour, mixing it in cup by cup. You an either do this by hand or with a stand mixer.
If using a stand mixer, place half the potatoes into the bowl and add just 2 cups of flour. Using the dough hook, mix the potatoes and flour together on the lowest speed. Stop once the flour is fully incorporated (2 - 3 minutes). Take out and repeat with the remaining potatoes and flour.
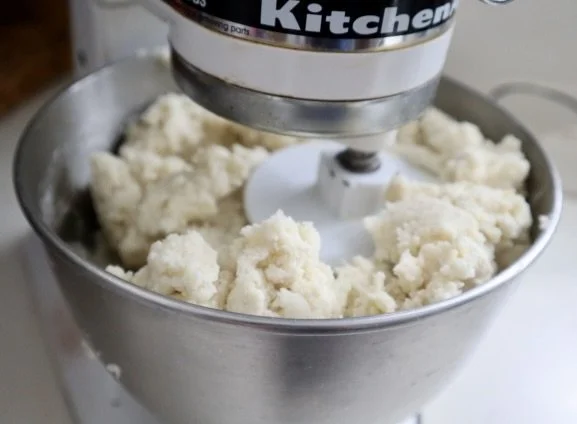
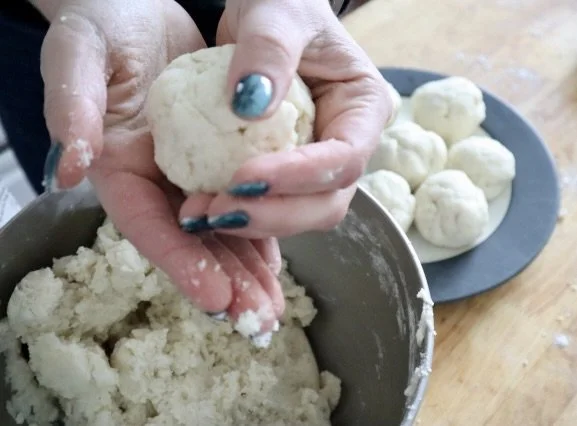
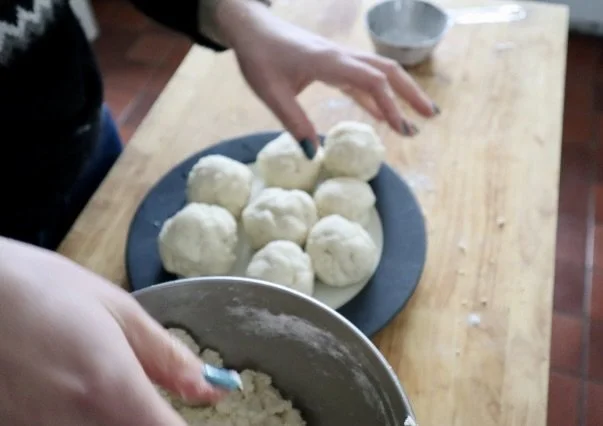
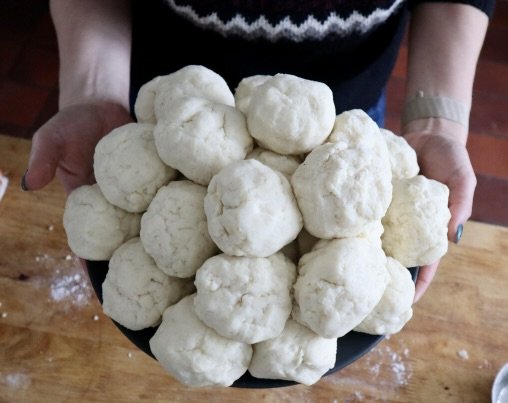
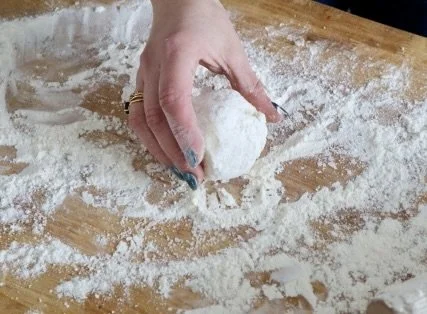
Roll your dough into balls about the size of a tennis ball or slightly smaller. Place on a plate, and put in the fridge to keep cold.
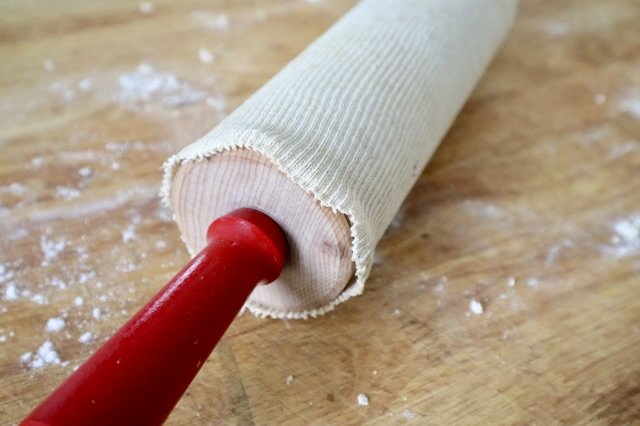
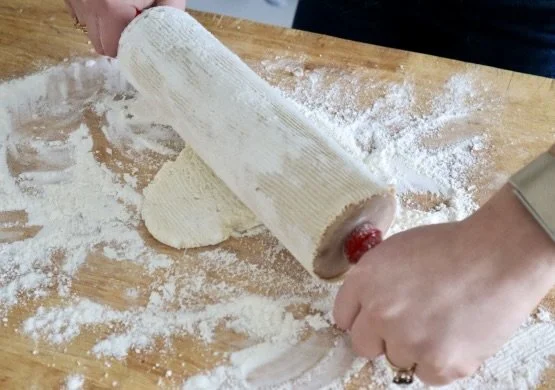
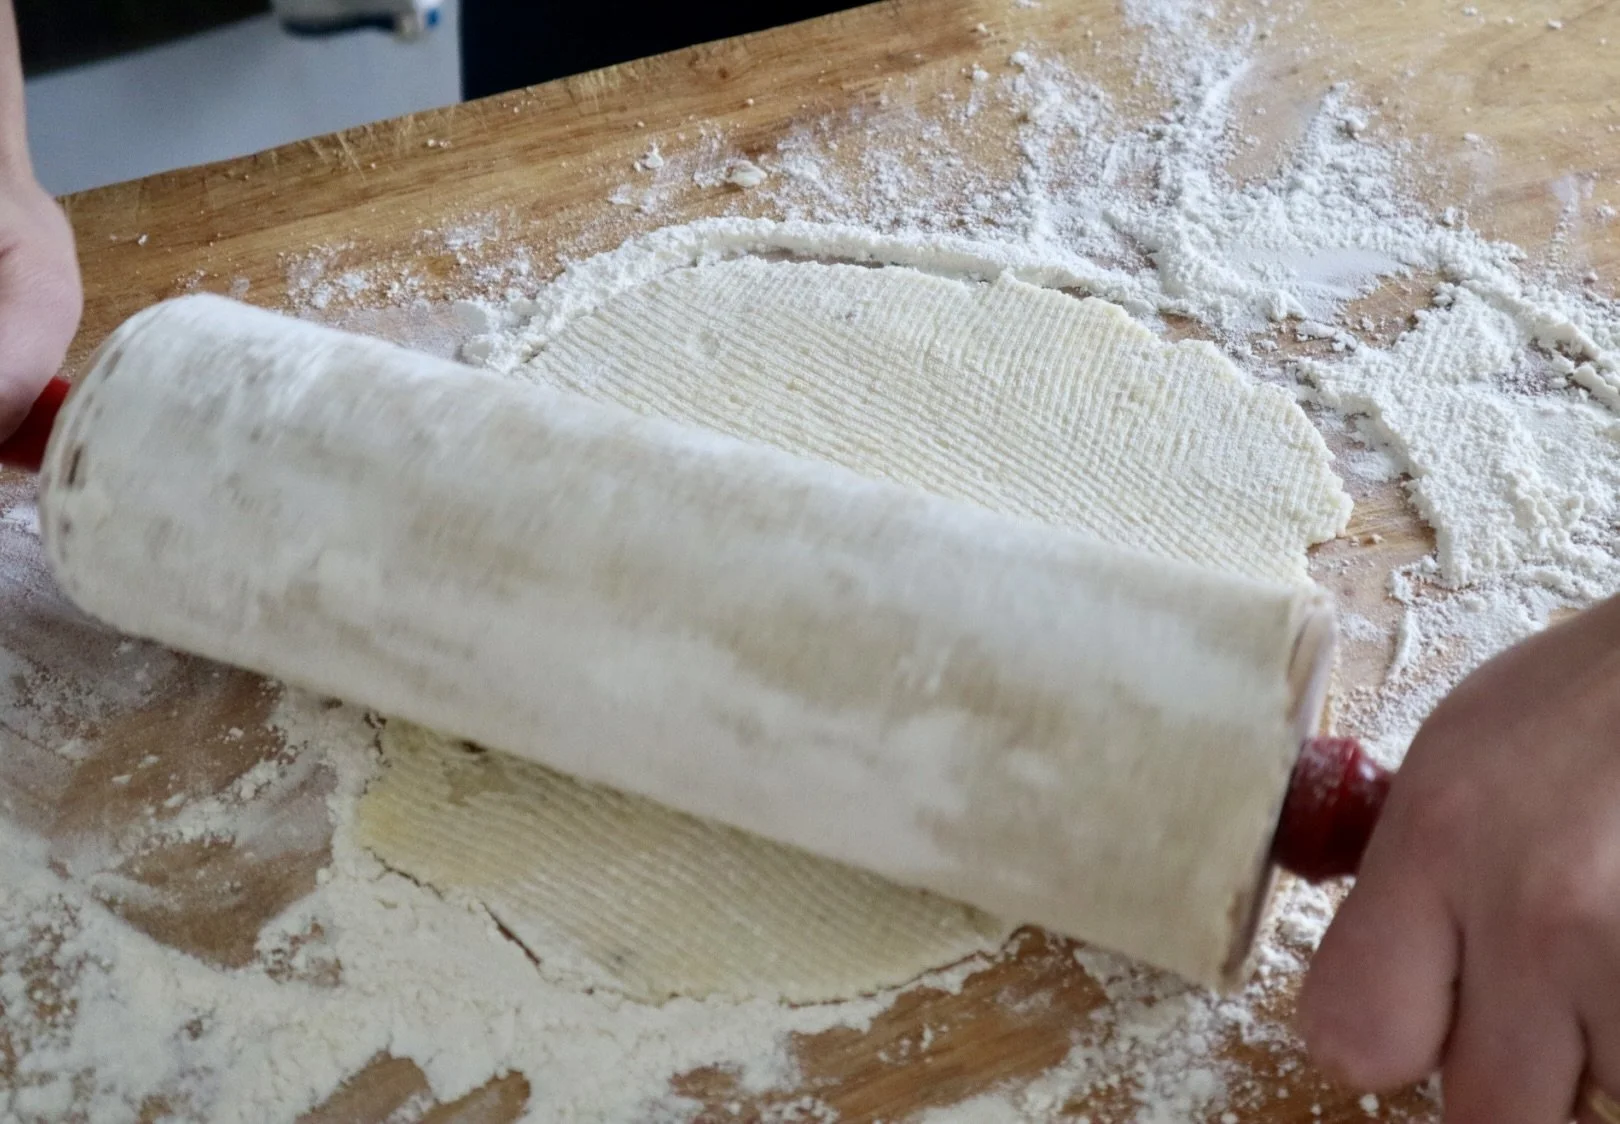
Now start setting up your workspace to begin grilling your bread. If using a lefse grill, set to 500 degrees. Generously flour the board you’re using to roll out your dough. Do the same with whatever implement you’re using to roll out the dough. If using the traditional grooved roller, I strongly recommend covering it with a cheese cloth. This will make it much easier to clean.
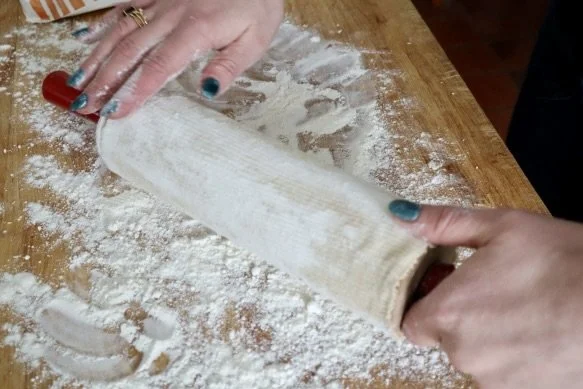
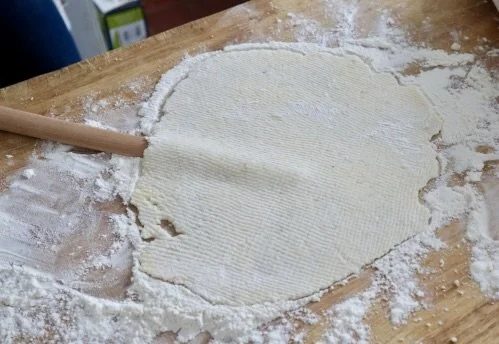
Once you have your workstation set up, take one lefse dough ball out of the refrigerator. (Leave the rest to chill). Roll the ball in some of the dough. Then taking your roller, gently roll out the dough into a circular shape. This doesn’t have to be perfect at all. Only roll it enough that the lefse is about the size of a medium-sized tortilla, but not so much that the dough starts to stick to the board.
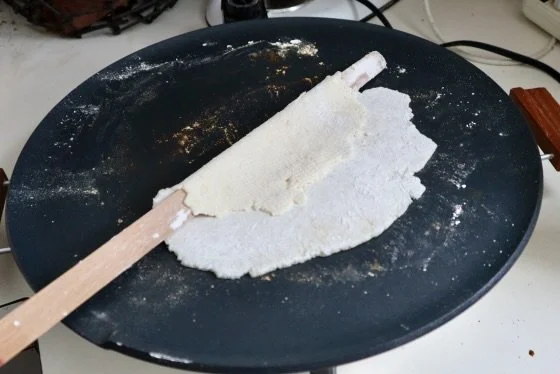
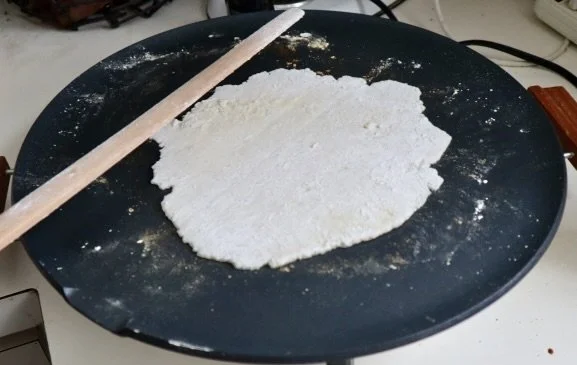
Taking your lefse stick (or another similar implement), gently tuck it under the middle of the dough. Carefully lift it from the floured board and onto the lefse grill. Twirl the lefse stick in your hands to gently place the dough on the grill.
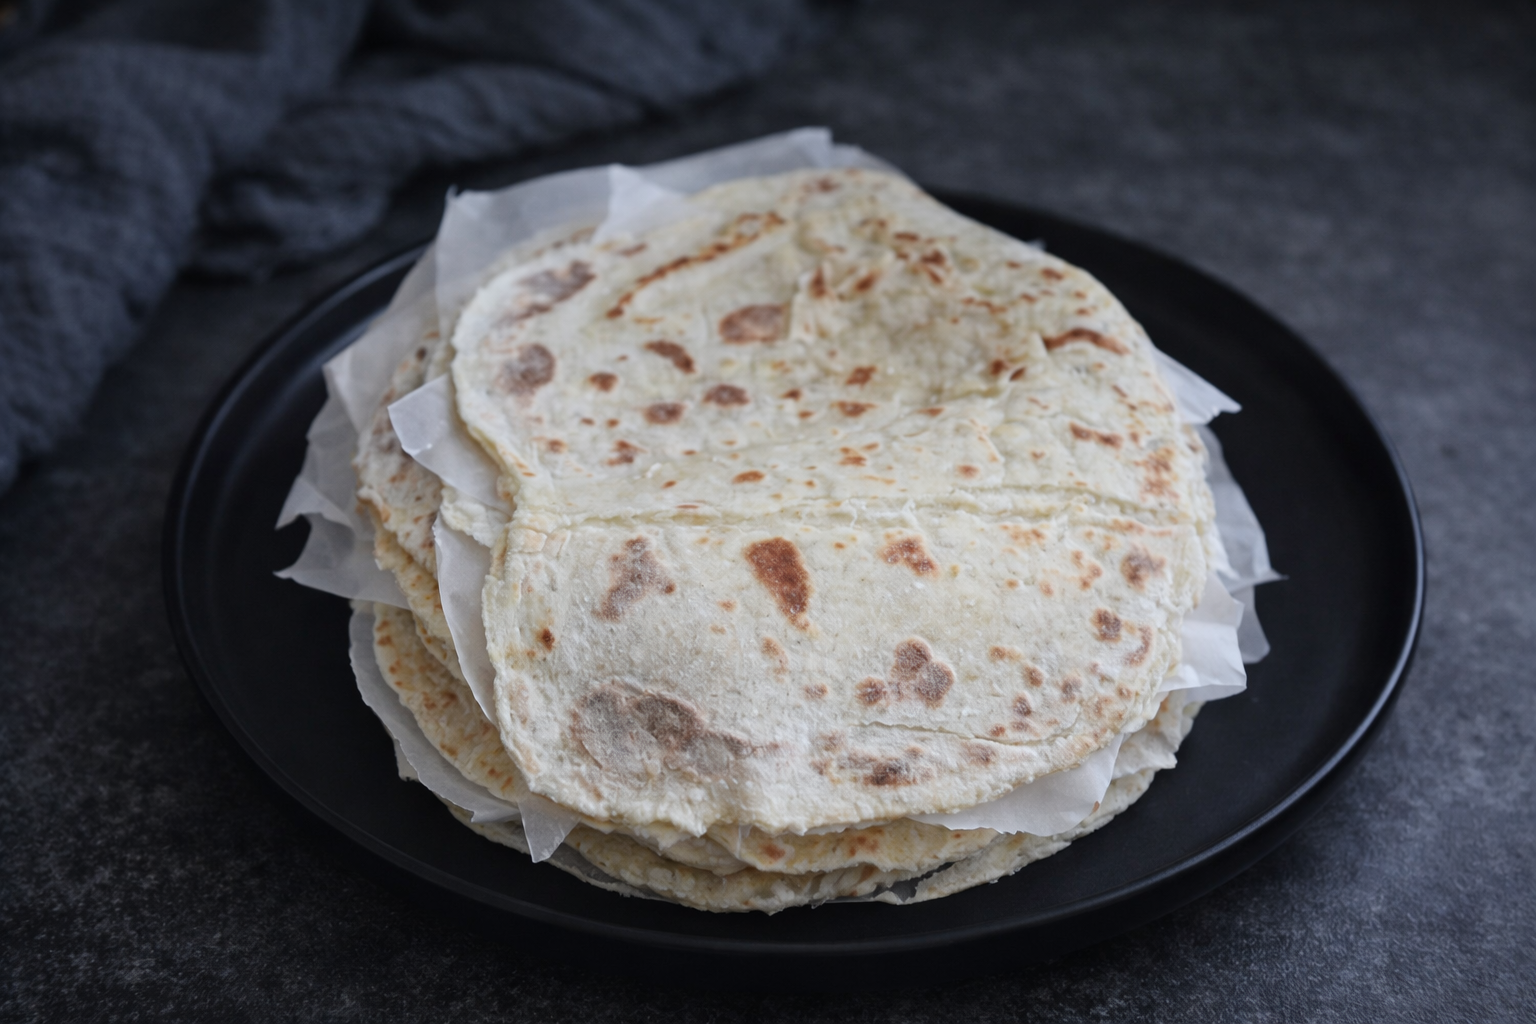
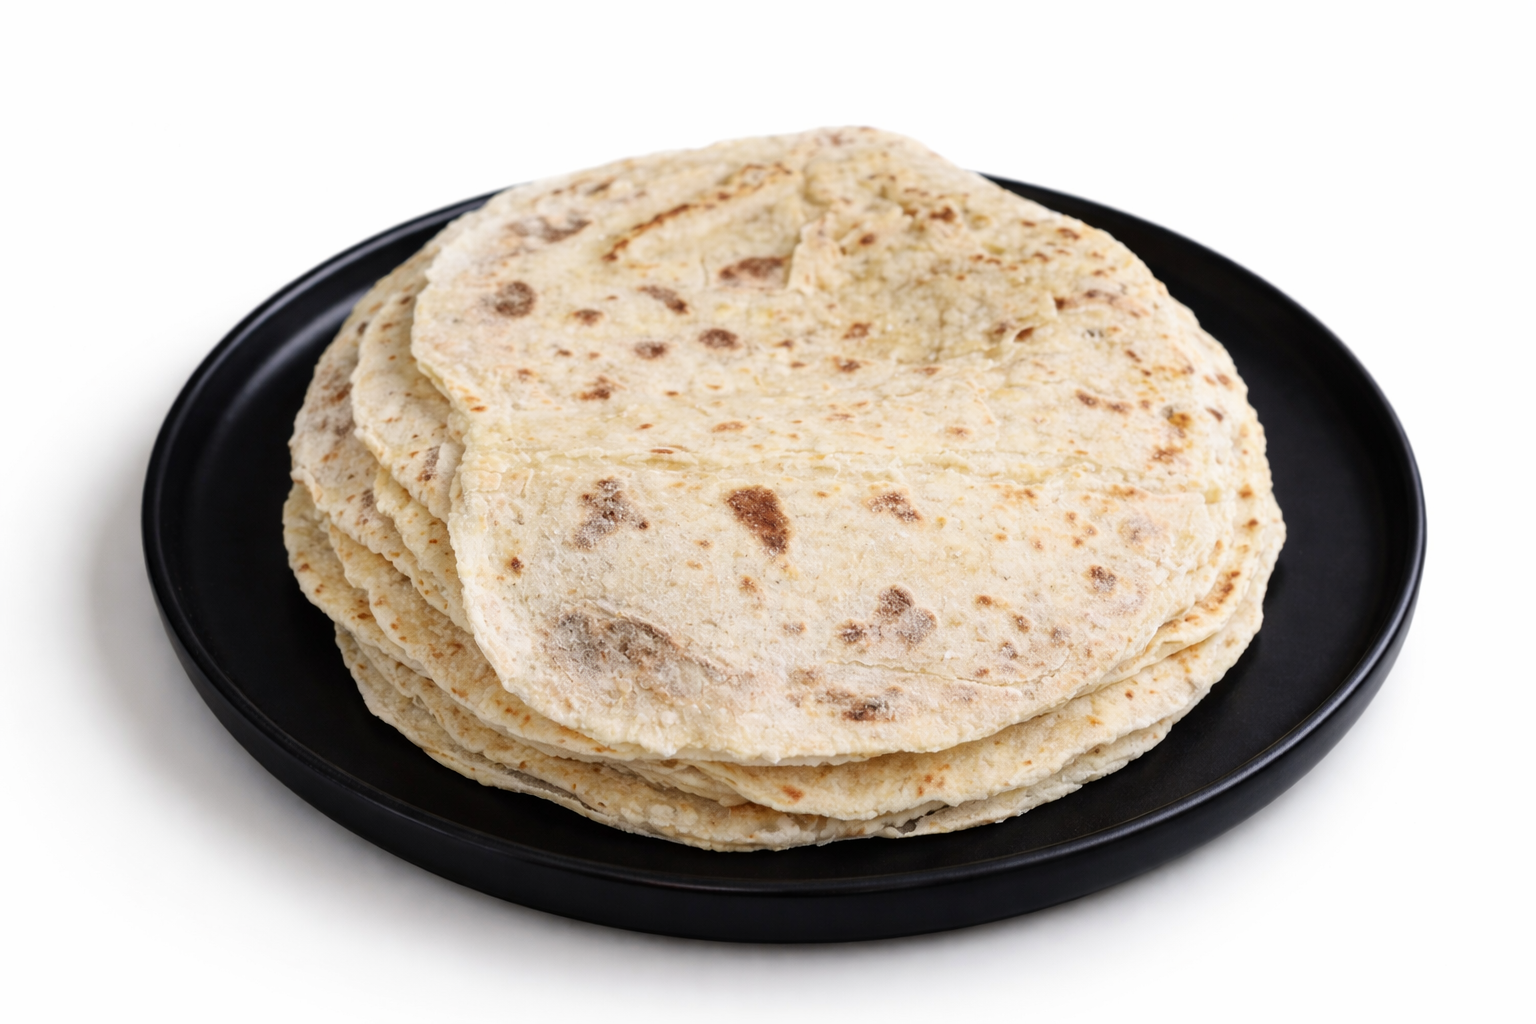
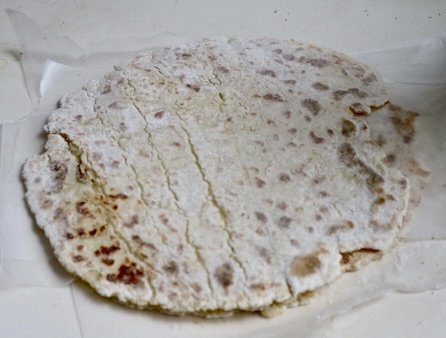
Let grill on each side for 3 - 5 minutes, or until you start to notice small brown spots. Take off the grill and let cool on a platter.
Repeat the process, placing wax paper between each completed lefse.

Once you’ve finished grilling, store the lefse in a ziploc bag and place in the fridge. Enjoy as a side, or with things stuffed inside (whatever you desire!). Lefse should be good for 5 to 7 days in the fridge.